
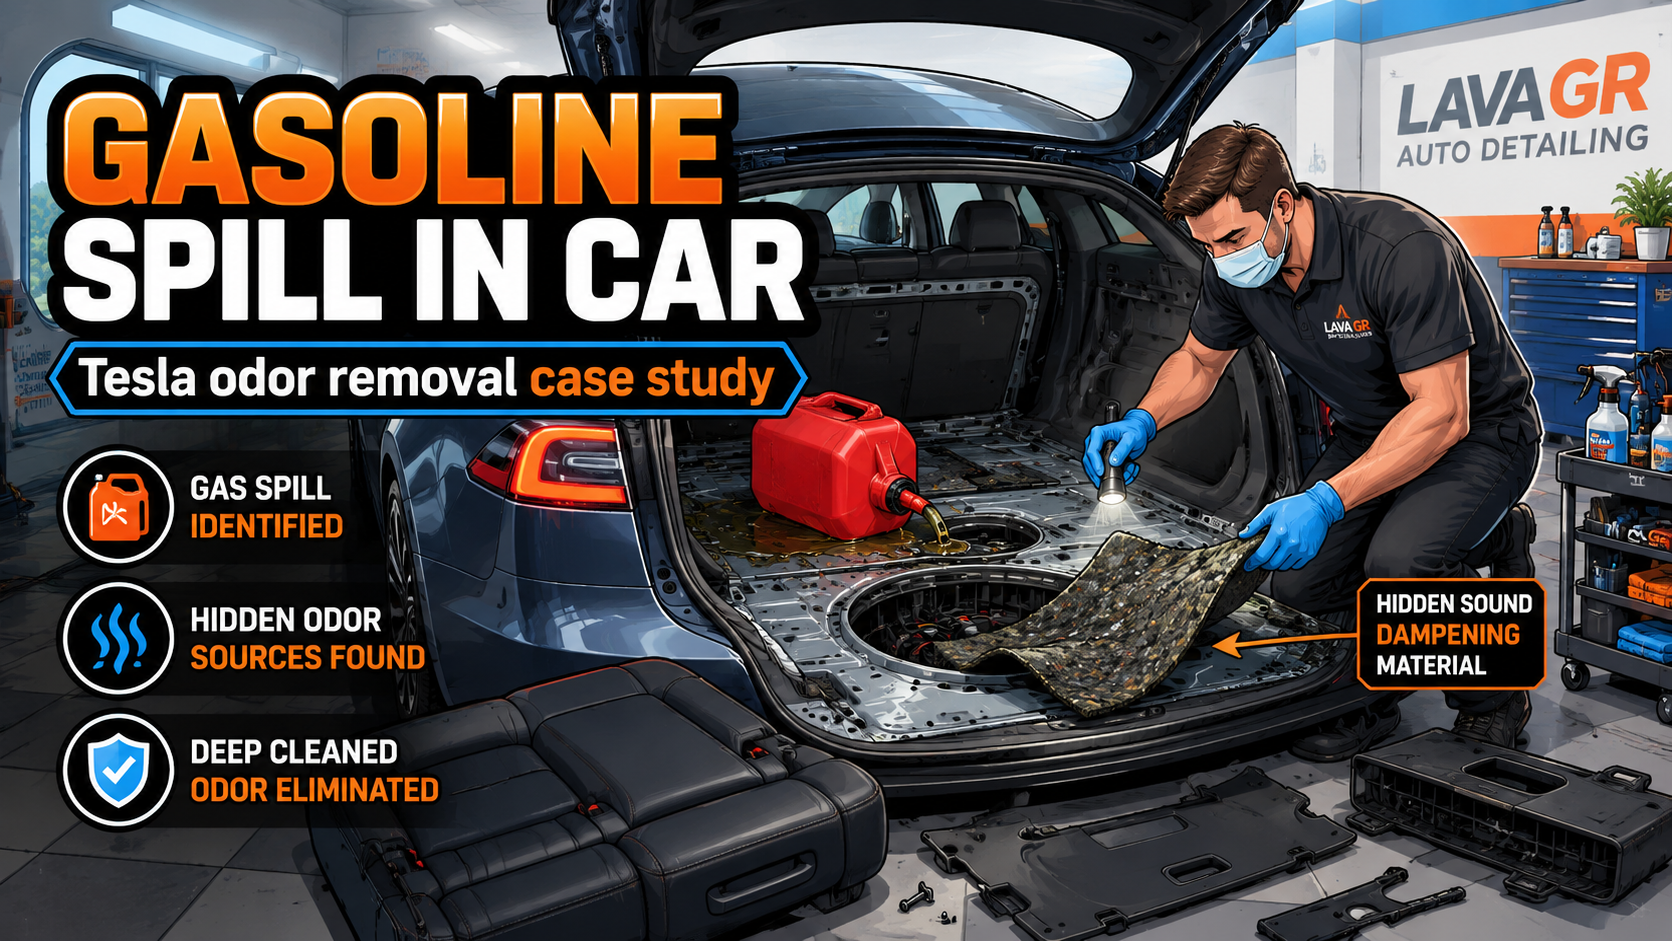
A gasoline spill in car interiors can become a much larger restoration problem than most people expect. That is exactly what happened when approximately one quarter gallon of gasoline spilled into the lower rear storage well of a customer’s Tesla.
What initially appeared to be a relatively straightforward gasoline spill in car cleanup became one of the more complicated odor-remediation projects we have handled.
At first, the solution seemed straightforward: disassemble the rear cargo compartment, remove the gasoline-contaminated materials, clean the exposed metal, replace the affected parts, detail the rest of the vehicle, and return it to the customer.
What initially looked like a $700 gasoline-spill cleanup eventually became an approximately $5,000 Biochemical/Biohazard remediation project involving around 40 hours of detailing, repeated interior disassembly, multiple treatments, insurance involvement, backordered Tesla parts, and one hidden material that kept holding the odor long after the visible contamination was gone.
This project taught us an important lesson:
When gasoline spills inside a vehicle, the liquid itself may be only part of the problem. Gasoline vapors can migrate into materials that never came into direct contact with the original spill.
Gasoline is a volatile and highly flammable mixture. Its vapors can irritate the eyes and respiratory system, and contaminated materials can continue releasing vapors through off-gassing after the visible liquid has been removed.
Here is how we finally found and eliminated the source.
What Happens After a Gasoline Spill in a Car?
This is one of the biggest challenges with a gasoline spill in car interiors: removing the visible liquid does not necessarily remove every material holding the odor.
The customer had transported a portable gasoline container inside the rear cargo area of his Tesla.
Approximately a quarter gallon spilled into the lower storage compartment beneath the main trunk floor. This is the recessed well located under the removable rear cargo cover.
The gasoline appeared to be contained primarily inside that compartment. It did not look like enough fuel had spilled to travel throughout the entire vehicle.
Our original plan included:
- Removing the rear cargo floor and covers
- Stripping the affected compartment down to exposed metal
- Removing contaminated padding and absorbent materials
- Cleaning and treating the exposed cargo well
- Ordering replacement cargo components
- Detailing the entire interior because of the strong gasoline fumes
- Reassembling the vehicle after the replacement parts arrived
Based on the visible contamination, we initially expected the job to remain within a relatively manageable budget.
That changed once we began trying to order Tesla parts.
What Makes a Gasoline Spill in Car Interiors So Difficult?
Normally, we would remove and replace materials like these rather than repeatedly trying to clean them. The problem was that the required components were backordered through Tesla with no reliable availability date.
Ordering the parts was also more complicated than ordering parts from a traditional dealership.
With most manufacturers, we can contact a dealership parts department, provide the vehicle identification number, verify the correct component, and place the order. The Tesla process required online systems and accounts, and it was much more difficult to get clear information about availability.
Tesla’s own service documentation identifies removable rear trunk components such as load floors, side garnishes, trim pieces, and rear-trunk noise, vibration, and harshness insulation. The exact configuration varies by model and year, which is why the vehicle identification number must be used before ordering parts.
The customer needed his vehicle back, so we could not leave it disassembled indefinitely while waiting for parts that had no estimated arrival date.
We cleaned and treated the compartment, detailed the interior, and returned the Tesla without the contaminated rear carpeted cargo-floor component installed.
The customer immediately reported that the vehicle smelled dramatically better.
For a short time, it appeared that the problem had been solved.
Why a Gasoline Spill in Car Interiors Can Keep Smelling
Approximately one week later, the customer called us.
The gasoline odor had returned and was once again very strong.
This was important because the original carpeted cargo component was still outside the vehicle. The most obvious absorbent material from the spill area was no longer installed, yet the interior still smelled strongly of gasoline.
The vehicle came back to Lava GR, and we expanded the scope of the investigation.
Instead of focusing only on the bottom of the cargo well, we removed additional components, including:
- The side cargo trim panels
- Additional rear carpeting and insulation
- Upper rear trim materials
- Accessible materials surrounding the cargo area
We discovered that the odor was not limited to the materials that had touched the liquid gasoline.
The vapors had off-gassed into surrounding trim and absorbent interior components.
We cleaned those pieces again and removed them from the vehicle. Because the materials still carried a strong petroleum odor, we stored them outside the shop rather than leaving them inside the building near vehicles, tools, and possible ignition sources.
Gasoline has a very low flash point, and its vapors can travel and ignite when they reach an ignition source. That is why contaminated vehicle materials should be handled as a safety issue, not simply as dirty upholstery.
After another complete treatment, we returned the vehicle.
Again, the customer was satisfied with the improvement.
Again, the odor eventually returned.
The Project Became an Insurance Claim
At this point, the job had grown well beyond the original estimate.
According to federal toxicology information on gasoline exposure, gasoline vapors contain volatile compounds and should be treated as a health and fire-safety concern.
We were no longer dealing with one contaminated cargo cover. We were dealing with gasoline vapors that appeared to have migrated into multiple areas of the rear interior.
We contacted the customer’s insurance company because the proper repair could require:
- Additional interior disassembly
- Replacement cargo trim
- Replacement insulation
- Replacement seat foam
- New rear seat components
- Repeated cleaning and odor treatments
- Significant additional labor
The estimated parts and outside repair costs alone were reaching several thousand dollars.
Unfortunately, the replacement materials remained unavailable or backordered. Even approximately six months later, some of the needed parts still had not become available.
That forced us to make a decision.
We could wait indefinitely for replacement parts, or we could continue trying to salvage and remediate the original components while preserving replacement as an option if the parts eventually became available.
We chose to keep treating the materials.
Can You Remove the Smell After a Gasoline Spill in Car Interiors?
Most of our team had been handling the repeated cleaning and reassembly work. Once the odor returned again, I stepped directly into the diagnosis.
I started at the original spill location.
Inside the rear storage well were small body plugs and drain-style openings. We considered whether liquid gasoline might have entered one of these areas and traveled into another cavity beneath the visible cargo floor.
That possibility had to be inspected, but it still did not completely explain why the main passenger compartment smelled so strongly.
I then inspected the lower cushion of the rear seat.
There was no clear path for the original gasoline spill to reach that seat. The quantity spilled was relatively limited, and the liquid had been contained in the lower cargo compartment.
Nevertheless, the rear seat cushion smelled strongly of gasoline.
The gasoline had not necessarily flowed onto the seat.
Its fumes had migrated into the main cabin and been absorbed by the seat foam.
We removed the rear seat, disassembled the remaining rear interior, and took the affected cushion out of the vehicle.
Removing the cargo-side trim and lifting the rear carpet was easier than many people might expect. Tesla’s interior trim is largely assembled with clips, fasteners, bolts, and layered panels. However, model-specific service information should always be consulted because seatbelts, electrical connectors, airbags, wiring, and low-voltage systems may be involved. Tesla’s service procedures show that rear trim work can require removing seat bolsters, C-pillar trim, side-rail trim, cargo panels, clips, and electrical connections in a specific sequence.
The rear seat was one of the more time-consuming pieces to remove because of its mounting points and the need to work carefully around the vehicle’s systems.
Once removed, it was clear that the seat foam had retained a substantial amount of odor.
Treating the Tesla Seat Foam Instead of Waiting for Parts
The replacement rear seat components were also unavailable.
We placed the affected seat and cargo materials outside so they could ventilate safely away from the active shop. The customer was going on vacation, which gave us approximately two weeks to continue working on the materials.
During that period, we repeatedly treated the seat and trim components.
The process included:
- Extended ventilation
- Exposure to fresh air and sunlight
- Multiple controlled shampooing treatments
- Repeated cleaning of the seat foam
- Cleaning and reconditioning the leather
- Allowing each component to dry fully
- Rechecking the odor after every treatment
We did not treat the parts once and assume the odor was gone.
Gasoline remediation requires evaluation after the material has dried and rested. A component can smell significantly better while wet or immediately after treatment, only for the petroleum odor to become noticeable again later.
Allowing the pieces to ventilate while continuing treatment made a major difference.
We were making progress, but something inside the vehicle was still producing a recognizable gasoline odor.
The Hidden Material That Looked Like Metal
The breakthrough came after the customer helped us identify an unusual material in the rear floor area.
Applied to portions of the metal body was a gray, hardened material used for sound control and vibration reduction.
At first glance, it did not look absorbent.
It looked and felt almost like part of the vehicle’s metal floor. It was hard, relatively smooth, and did not resemble carpet, open-cell foam, jute padding, or ordinary insulation.
Because it appeared solid, it had been sitting directly in front of us during the earlier cleanings without looking like an obvious contamination source.
But it was not metal.
It was a hardened sound-dampening or noise-control material bonded to the body.
Tesla identifies several rear-body insulation and noise-control components in its repair documentation, including floor NVH insulation, noise absorbers, wheelhouse insulation, and motor-bay insulation.
When we began scraping the gray material with a hard chisel, the answer became obvious.
The gasoline odor was extremely strong inside it.
Although the surface felt hard and appeared nonporous, the material had retained gasoline contamination. It had effectively become a hidden odor reservoir beneath the removed fabrics and trim.
Every time the vehicle warmed up, that material released more gasoline odor into the cabin.
That explained why:
- Removing the original cargo carpet did not solve the problem
- Replacing and cleaning the visible trim was not enough
- Treating the rear seat improved the vehicle but did not finish the job
- The gasoline smell continued returning after the vehicle sat for several days
The problem was bonded to the vehicle’s body and hiding in plain sight.
Removing the Contaminated Sound-Dampening Material
We mechanically removed the contaminated sound-dampening material from the affected portions of the rear floor.
This required carefully scraping it away from the body until the gasoline-retaining material was no longer present.
Once it was removed, we performed another full treatment of the vehicle.
That included:
- Cleaning the exposed rear floor
- Treating the cargo compartment again
- Recleaning the passenger cabin
- Reinstalling the successfully remediated components
- Additional chlorine-dioxide odor treatments
- Additional cleaning treatments throughout the cabin
- Drying and ventilation
- Final odor inspections after the vehicle rested
After the contaminated sound-dampening material was gone, the gasoline odor finally stopped returning.
The Tesla was reassembled and delivered to the customer.
This time, the repair held.
Approximately 40 Hours of Detailing and Remediation
By the end of the project, we had approximately 40 hours invested in:
- Repeated vehicle inspections
- Cargo-area disassembly
- Rear trim removal
- Seat removal
- Multiple complete interior details
- Repeated treatment of seat foam
- Cleaning and reconditioning leather
- Ventilating contaminated materials
- Communicating with Tesla and researching parts
- Documenting the loss for insurance
- Removing contaminated sound-dampening material
- Reassembling the interior
- Performing final odor treatments
- Conducting repeated quality checks
The total project reached approximately $4,500 beyond portions of the initial work, putting the full gasoline-spill remediation at roughly $5,000.
This was not a $5,000 car wash.
It was a complete contamination investigation involving repeated disassembly, source identification, materials remediation, parts research, insurance documentation, and a repair guarantee.
Why We Did Not Give Up on the Original Parts
Some people may wonder why we continued cleaning materials that we originally planned to replace.
The answer is availability.
When a replacement component is readily available and economically reasonable, replacement may be the best option for gasoline-contaminated foam, insulation, or padding.
That was not the situation here.
Some components had no estimated delivery date and remained unavailable months later.
Rather than waiting for a part that might never arrive, we treated the original materials proactively.
That gave us several possible outcomes:
- The treatments could successfully restore the components.
- The parts could be used temporarily until replacements arrived.
- The customer could retain the restored components as backups.
- Salvageable pieces could retain some value instead of being immediately discarded.
- We could learn which materials responded to treatment and which required permanent removal.
In this case, the repeated treatments worked well enough to save major components that otherwise might have left the vehicle unusable for months.
The Most Important Lesson From This Tesla Gasoline Spill
If we received the same vehicle today, we would approach it differently from the beginning.
We would still remove the visibly affected carpet, insulation, cargo covers, and trim.
But we would also immediately inspect:
- Bonded sound-dampening materials
- Floor-pan coatings and insulation
- Body plugs and lower cavities
- Rear seat foam
- Adjacent cargo trim
- Carpet backing beyond the visible spill
- Materials that may have absorbed vapors without touching liquid gasoline
The biggest lesson is that a material does not have to look soft or porous to retain gasoline odor.
The gray sound-dampening material looked and felt almost like metal. Until we cut into and removed it, there was no obvious visual indication that it had absorbed the gasoline.
Once disturbed, however, the retained odor was unmistakable.
Can Gasoline Smell Be Removed From a Car?
In many cases, yes, but the gasoline must be removed from every material holding it.
A surface detail may improve the smell temporarily without resolving the contamination.
The final repair may require:
- Removing cargo panels
- Lifting carpet
- Removing seats
- Treating seat foam
- Replacing insulation
- Removing bonded sound-deadening materials
- Repeated ventilation
- Multiple cleaning cycles
- Reinspection after the vehicle has warmed up
The correct process depends on:
- How much gasoline spilled
- Where it entered the vehicle
- How long it remained
- Which materials absorbed it
- Whether fumes migrated into the main cabin
- Whether replacement parts are available
- Whether the vehicle can be safely and economically restored
A strong gasoline odor should not simply be covered with fragrance.
The source needs to be found and removed.
Why Gasoline-Spill Estimates Need a Contingency Budget
Initially, the visible damage suggested a much smaller project.
The deeper problem became apparent only after:
- The vehicle was returned to normal use
- The interior warmed up
- The odor returned
- Additional materials were removed
- The seat foam was inspected
- The bonded floor material was physically scraped open
For that reason, gasoline-spill estimates need room for supplemental work.
A professional estimate should account for the possibility of:
- Additional disassembly
- Previously hidden contamination
- Multiple cleaning cycles
- Parts delays
- Materials that cannot be restored
- Insurance supplements
- Longer drying and ventilation times
- Follow-up inspections after delivery
Charging only for the first visible layer may leave the shop unable to complete the repair properly.
At Lava GR, we stand behind our work. That means our pricing must leave enough room to continue investigating if the odor returns.
The Final Result
The customer ultimately received his Tesla back without the persistent gasoline odor.
He was extremely happy with the result and left Lava GR a five-star review.
We did discover one small reassembly issue afterward involving a rear seatbelt that had not been positioned correctly. We sent one of our technicians to the customer, corrected the seatbelt placement, and completed the job.
That follow-up matters.
Complicated interior disassembly creates more opportunities for small clips, trim pieces, wiring connections, and seatbelt components to require adjustment. The job is not complete until the vehicle is rechecked and the customer is satisfied.
Professional Gasoline-Spill Cleanup in Grand Rapids
Gasoline spilled inside a vehicle is not a normal interior-detailing problem.
It can involve flammable vapors, hidden contamination, absorbed hydrocarbons, interior disassembly, replacement parts, and insurance documentation.
Lava GR Auto Detailing handles advanced interior restoration and contamination-cleanup projects for customers throughout Grand Rapids, Wyoming, Grandville, Kentwood, Byron Center, and surrounding West Michigan communities.
Our services include:
- Gasoline and chemical-spill remediation
- Vehicle odor-source investigation
- Interior disassembly
- Seat and carpet removal
- Foam and upholstery treatment
- Biohazard vehicle cleaning
- Mold and water-damage remediation
- Insurance estimates and documentation
- Full interior restoration
If gasoline has spilled inside your vehicle, avoid using fragrance products to hide it. Keep the vehicle away from flames and other ignition sources and arrange for a professional inspection.
Contact Lava GR Auto Detailing for a gasoline-spill remediation estimate.
Learn Advanced Vehicle Remediation
This Tesla project is a perfect example of why advanced detailing requires more than knowing how to shampoo carpet.
A professional must understand:
- How contamination migrates
- How vehicle interiors are assembled
- Which materials can be restored
- When replacement is necessary
- How to price open-ended restoration work
- How to document insurance claims
- How to keep investigating when the obvious repair does not work
Lava GR offers hands-on professional auto detailing training covering interior and exterior detailing, paint correction, ceramic coatings, and advanced restoration principles.
Students train in a working detailing shop and learn from real projects, including the difficult vehicles many shops refuse to accept.
Visit our professional auto detailing training in Grand Rapids page to view upcoming classes and certification programs.